In this tutorial, we will teach you how to use all the tools of The Visual Editor in WordPress.
The ToolBar
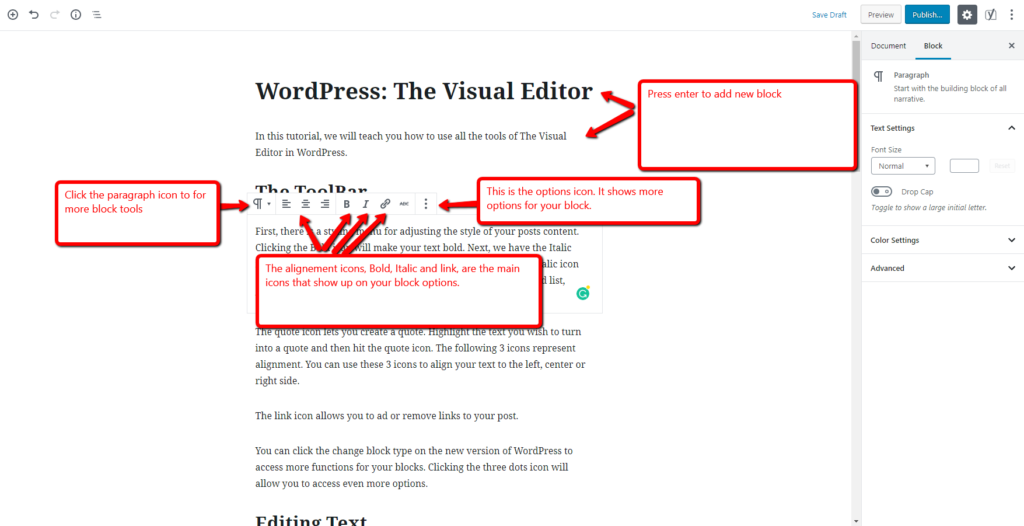
First, there is a styling menu for adjusting the style of your posts content. Clicking the Bold icon will make your text bold. Next, we have the Italic icon. Clicking the Italic Icon will italicize your text. Next, to the italic icon are two list icons. One of the list icons is an unordered or bulleted list, whilst the other is an ordered or numbered list.
The quote icon lets you create a quote. Highlight the text you wish to turn into a quote and then hit the quote icon. The following 3 icons represent alignment. You can use these 3 icons to align your text to the left, center or right side.
The link icon allows you to ad or remove links to your post.
You can click the change block type on the new version of WordPress to access more functions for your blocks. Clicking the three dots icon will allow you to access even more options.
Editing Text
The Page and Post editor is functionally the same. Begin by clicking either in the Pages or Posts buttons in the Dashboard. Hover over the post you would like to edit and click Edit. On the new updated WordPress, text functions via Blocks. You start off with a block for the title. You may press enter to add a new. A block is basically a way of separating paragraphs, images etc.
Document and Block Options
When writing a post, on the right-hand corner you have your Document and Block options.
Block Options
When you are writing or editing a post, the Block option will be selected automatically. When the Block option is selected, below it you will see options for Text Settings, Font Size, Drop Cap and two more drop – down options for Color Settings and Advanced.
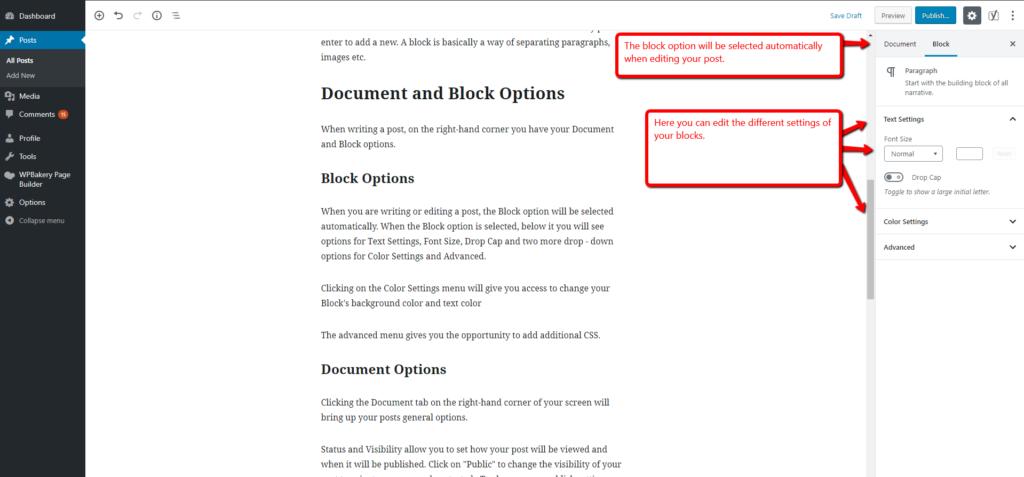
Clicking on the Color Settings menu will give you access to change your Block’s background color and text color
The advanced menu gives you the opportunity to add additional CSS.
Document Options
Clicking the Document tab on the right-hand corner of your screen will bring up your posts general options.
Status and Visibility allow you to set how your post will be viewed and when it will be published. Click on “Public” to change the visibility of your post to private or password protected. To change your publish settings, click on Immediately and you may set a date for your post to be published on.
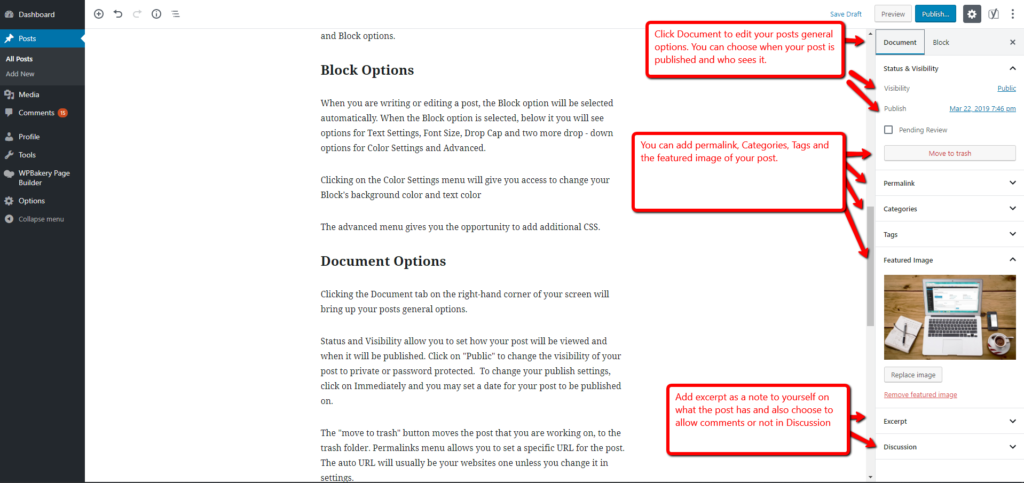
The “move to trash” button moves the post that you are working on, to the trash folder. Permalinks menu allows you to set a specific URL for the post. The auto URL will usually be your websites one unless you change it in settings.
Click the “set featured image” button to add a main image for your post. You can add an Excerpt for a post as a reminder to you on what the post is about. In the discussions menu you can choose if you wish to allow comments for the current post when published.
Publish
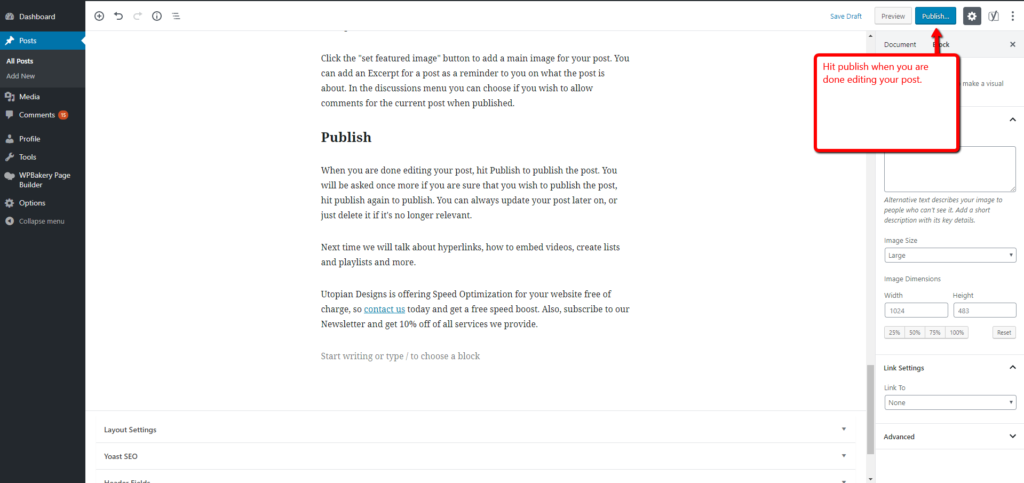
When you are done editing your post, hit Publish to publish the post. You will be asked once more if you are sure that you wish to publish the post, hit publish again to publish. You can always update your post later on, or just delete it if it’s no longer relevant.
Next time we will talk about hyperlinks, how to embed videos, create lists and playlists and more.
Utopian Designs is offering Speed Optimization for your website free of charge, so contact us today and get a free speed boost. Also, subscribe to our Newsletter and get 10% off of all services we provide.

